Categories
Garage Door Maintenance

How to Maintain A Garage Door This Fall

Understanding how to maintain a garage door is important to the lifespan of your garage door. If you ignore it for too long, you will likely encounter one of several common garage door issues.

In this article, you’ll learn how to maintain a garage door this fall.

How to Maintain A Garage Door This Fall

Now that Fall is on the way, you should think about maintaining your garage door. You want to ensure that it stays in top working condition before the colder weather really sets in. After all, no one wants to be out in the rain or snow trying to fix a broken door. 

With some maintenance though, you’ll drastically reduce the chance of this happening. Use this guide to help you maintain your door this fall and keep it working properly for you, every time you open it. 

Here’s how to maintain a garage door …

Inspect Your Door

Firstly, you want to inspect your door. You’re looking for anything that indicates there’s a problem, or that something is wearing out. Consider how the door has been working over the last few months. Is it louder than usual? Does it open smoothly, or does it become jerky? Does everything seem to be in even alignment?

If you see anything that needs to be repaired, consider if it’s something that you can do yourself. Many jobs, like cleaning photo eyes or fixing dents, can be done yourself with the right tools. However, broken springs and other maintenance should be done by a professional, for safety. 

Also, remember to unplug your automatic garage door opener if you’ll be doing work on the door. This will stop it opening or closing as you work, keeping you safe. 

Do Safety Tests

As you inspect your garage door, do some safety tests to ensure that everything is in working order. If you see any problems, talk to a professional to get help making the door safe to use again. 

Auto-reverse feature: Place a piece of wood in the path of your garage door, and activate the door to close. The door should stop short of the blockage, and reopen. If it doesn’t, you may need to adjust the limit switch on the door. 

Door photo eyes: Locate the photo eyes of your garage door, which should be either side of it, near the bottom. Activate the door to close, and then wave an object between them. If they’re working correctly, the door should auto-reverse. If it doesn’t, you may need to clean the photo eyes or realign them to get this feature working. 

Garage door balance: Unplug your garage door from the automatic opener, so it will open manually. Then, lift the door halfway up and release it. The door should stay in place until you move it again. If it slips down, the door isn’t balanced. You’ll need to call a professional to fix the problem. 

Maintain The Garage Door Opener Drive Belt

The garage door opener should open your door smoothly, so open your door to test it. Do you hear groaning or snapping sounds? That’s a sign that there’s too much slack in it. To fix this, unplug the opener and then locate the adjustment bolt on the chain drive or belt. There should be nuts either side to help you adjust it. 

Use a wrench to turn the first nut counter-clockwise, and then the second nut should be turned clockwise. This should make the belt pick up the slack. When tightening, ensure you don’t tighten too much as this could lead the belt to break. 

Before testing the door again, lubricate the chain belt with a lithium grease spray, to help stave off corrosion. Then, plug the opener back in and try the door again to see if the sound has stopped. 

Check And Replace Seals

The weatherstripping at the bottom of the garage door keeps out everything from rainwater to pests, so it’s important that it’s in good condition. If the seal looks brittle or broken, you’ll need to replace it. You can easily pick up a new seal at any hardware store. 

Open the garage door to about chest height and secure it using a clamp to keep it in place. Pry off the old weather stripping using a screwdriver, and clean the door groove to remove any debris. Insert the new weather stripping at one end, and then slide it along the bottom the door. Trim the ends off. And fold the ends back on themselves into the door groove to secure them. 

Clean The Garage Door Surface

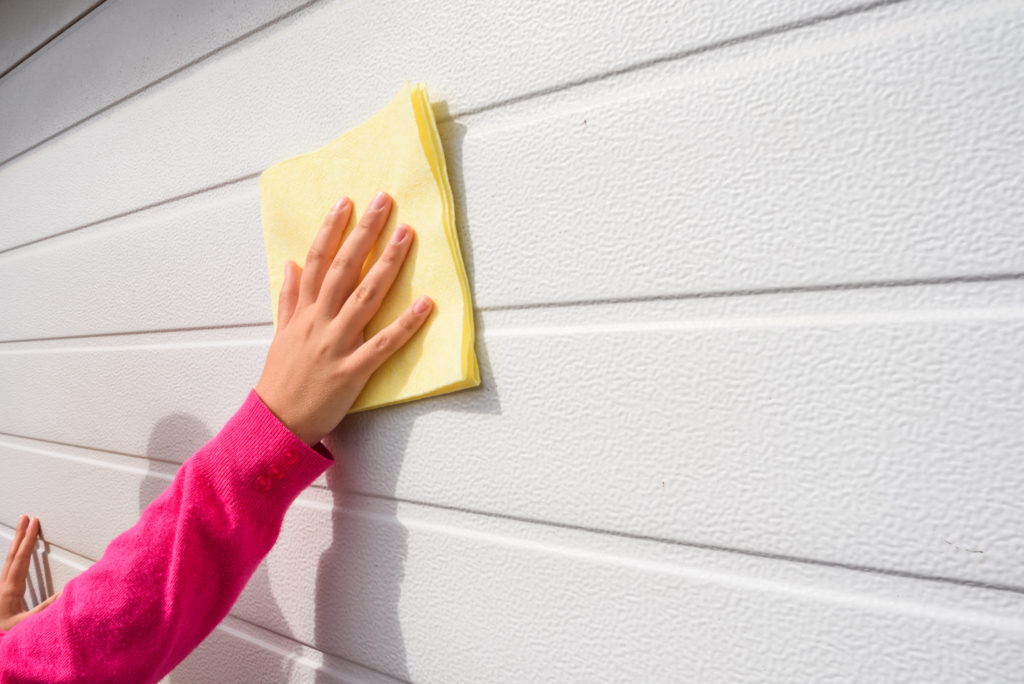
Cleaning the garage door not only improves curb appeal, but it helps with keeping it in good condition. The way you clean your garage door will depend on the material it’s made of. If it’s a wooden door, wipe it down with a soft, dry cloth. Inspect it for any staining, a sign of insect damage. Also, consider if the door needs to be repainted. If you will repaint, patch any small holes with wood filler, then sand and paint the surface. 

If the door is a synthetic material, such as vinyl, you can wash it down with a soft cloth and the appropriate cleaner. Rinse it off using a hose, then dry it off with a microfiber cloth. 

On the inside of the door, wipe away any cobwebs and wipe the door down with a soft dry cloth. If needed, use a lightly moistened cloth to clean off stained areas. 

Replace The Battery

You’ll need to test your back up battery in your garage door opener, to see if it still has power. You’ll need it if the power goes out and you need to get your car out of the garage. Unplug the opener, and then press the button on inside of the garage. If the door opens, the battery should be fine., If not, it needs to be replaced. 

Obtain a new battery for your garage door opener, and then open the battery cover on it. Remove the spent battery and replace it with a new one, then close it up and try the door again to ensure the battery works. 

With these tests, you’ll be able to ensure your garage door is ready for fall. Simple maintenance stops most breakdowns from happening, so check over your door now and ensure it’s in good repair. 

Professional Maintenance

Whether you’re not comfortable working with the various components of your garage door, we recommend you request an estimate from a professional in your area.

A professional garage door service provider will have the experience needed to identify potential issues and resolve them before they develop into expensive problems.

Make us Your Garage Door Guys today if you’re in the Los Angeles or Ventura area. We provide expert garage door maintenance and repair through these areas, including Simi Valley to Northridge and beyond.

Categories
Garage Door Maintenance

8 Reasons You Have A Noisy Garage Door

Do you have a noisy garage door?

There are several reasons garage doors begin making noises, but most can be resolved with a garage door tune-up.

In this article, we’re taking a look at some of the reasons you may have a noisy garage door.

Reasons You Have A Noisy Garage Door

Ideally, your garage door should open and close smoothly, with no noise at all.

However, over time it’s begun to make all kinds of strange noises. It squeaks, rattles, pops and grinds, and the noise is driving you up the wall. That noise is a sign that something is up with the door, and so you’ll need to find the source of the sound. 

Here are 8 reasons you have a noisy garage door.

1. The Door Needs To Be Lubricated

This is the most common reason why your garage door is making noises. If it’s squeaking as you open and close it, this is going to be the culprit. 

Lubricating your garage door is vital, as it helps it ensure the garage door mechanics run smoothly. Whenever you do any garage door maintenance, it’s important that you lubricate all the moving parts. This includes the lock mechanism, the tracks, hinges, rollers, springs, and the top of the rail. 

When you do this, ensure that you use a lithium lubricant that’s designed for garage doors. Plenty of homeowners use sprays like WD40, but it isn’t actually designed to be a lubricant. Ensure you’re picking the right one so you properly lubricate the door. 

2. Worn Out Rollers

Are you hearing a grinding sound when you open or close your garage door?

That’s a sign that the rollers are wearing out. Firstly, try lubricating the rollers. In many cases, this will be enough to get them to be quiet. If the grinding sound persists though, you’ll need to replace those rollers

If you choose to replace the rollers yourself, take care, as garage door repairs are often tricky and pose safety risks if not done correctly. If you’re not sure, always call a professional to handle the job for you. 

Learn more about garage door roller replacement.

3. Loose Hardware

Take a look at your garage door, and you’ll see there’s lots of nuts, bolts, and other hardware holding it all together. They do a good job, but over time the vibration of your garage door can shake them loose. If you’re hearing a rattling, you’ll need to find the source quickly. That’s a sign that something is coming loose and needs to be mended

Take a look at your garage door, and look for any parts that are coming loose. A word of warning though. Never attempt to tighten anything attached to your springs, as they’re very dangerous when handled improperly. If this is the culprit, have a professional handle it for you. 

4. Loose Chain Drive

A loose chain drive is one of the most common reasons people experience a noisy garage door. If your garage door uses a chain drive to open and close, it may have come loose and started creating that noise. Turn your garage door opener off, and take a look to see if this is the case. Check the instruction manual to see how to tighten it

If it doesn’t appear to be loose, try lubricating the chain drive. In some cases, this will be enough to silence the sound of it. 

5. Worn Out Springs

Are you hearing a popping noise when you open or close the garage door? That’s a sign that the torsion springs are wearing out. If you’re hearing this, you need to address this as soon as possible. As mentioned above, springs are highly dangerous. They hold a lot of tension, and if they break they can do some serious damage. If you’re home and hear a loud bang come from the garage, you’ll see that a spring has broken on your door. 

Some are able to repair the springs themselves, but if you’re hearing those popping noises this is the time to call in a professional. They’ll be able to keep you safe and replace those springs before anyone gets hurt.

6. Missing Garage Door Insulation Strip

The insulation strip on the bottom of your garage door is more important than you’d think. It helps keep the weather, and pests, out of your garage. It also helps the garage door close quietly. Are you hearing a loud bang when you close the garage door? Check your insulation strip. It could be damaged, or missing entirely. 

This is easily fixed by replacing the insulation strip on the door. They should be easily picked up at your local hardware store. When you do routine maintenance, always look to see how the insulation is holding up, and replace it as soon as there are signs of damage. 

7. Worn Out Garage Door Hinges

If you’re hearing squeaking, another reason for it could be worn out hinges. You can tell if this is the problem because you’ll see gray dust, or filings, around the hinge. This is a sign they’re beginning to deteriorate.  

If this is happening, it’s time to replace the hinges to stop this from happening. If you’re handy you can do this yourself, or you can have a professional handle it for you. 

8. Bent Tracks

Can you hear a rubbing noise when you open and close the garage door?

That’s a sign that there may be a bend in the tracks it travels on. The door may be working fine for now, but over time that will cause a lot of damage to your door. You’ll be able to tell if this is the case if your door sticks while in transit. You can also take a look at the tracks to see if there any bends in them. 

If the bends are minor, you may be able to tap them out with a rubber mallet. If it’s a significant dent though, those tracks will need to be replaced. 

And there you have it. No matter what kind of noise your garage door is making, you’ll be able to handle it by identifying the source of the problem. If you’re ever unsure, call on a garage door company to help you rectify the problem. 

Next Step

Now that you know some of the reasons that may be responsible for your noisy garage door, you can take the next step. If you’re comfortable working with your garage door, you may be able to resolve the issue on your own.

If you’re not comfortable working with the various garage door parts, you may find it helpful to call a professional garage door service for help.

A professional will assess the issue and fix the problem quickly and efficiently.

If you’re looking for a local garage door service near you, consider calling Your Garage Door Guys today.

Categories
Garage Door Maintenance

Common Garage Door Issues

If you have a garage door, you may run into several common garage door issues. This may be due to the age of the garage door or how often you use it. Garage doors are designed to last for years, but they do require maintenance from time to time.

In this article, we’re taking a look at some of the more common garage door issues homeowners face over time.

Common Garage Door Issues

Your garage door is made up of a lot of moving parts, and over time you’ll see that some begin to fail. That means you can’t get the door open, get it closed, or even lock it. There are several reasons why you’re experiencing an issue with your garage door. 

Here are several common garage door issues.

Garage Door Keeps Auto Reversing

Is your garage door auto-reversing when you go to shut it? This is usually a safety feature, used to stop the garage door from shutting on you or your car if you happen to be standing in its path. If the door is auto-reversing even when the path is clear, that’s a sign that there’s something wrong with the photo eyes.

These sit at either side of the door, close to the ground. In most cases, you’ll see they’re just dirty. When they are, they are stopped from working properly, and so assume there’s something in the doorway. Wipe them off with a dry soft cloth, and try closing the door again. 

If this doesn’t work, the eyes may be misaligned. This causes the door to auto-reverse, as it interrupts the light beam between them. Tie a length of string between them, and adjust the mounts until the string is totally level. This should solve the problem. 

Dented Garage Door

It’s easier to dent a garage door than you’d think. Severe weather can do it, as well as a stray football or a tap from your car. A small dent can easily be removed, though. There are a couple of methods you can use to get that dent out. Firstly, you can try using a rubber mallet and a 2 x 4 of wood. Hold the wood against the spot the dent bends outwards, and use the mallet to tap the wood and push the metal back into place. You can also try the aluminum foil, canner air, and lighter method, which is popular with mechanics.

If the dent is too bad to be pushed out, you can replace the panel without replacing the whole door. You’ll see you can slide the panel out of your garage door and replace it with a new one. Talk to the supplier of your garage door to get the right panel for you. 

Garage Door Won’t Open

If the garage door won’t open when you press the button on your remote, there could be several reasons why. Firstly, let’s look at the most simple ones. Is the garage door locked closed? This could be stopping it from moving. The garage door opener may have been unplugged, stopping it from working. The batteries in the remote may simply be dead and need replacing. 

It could also be that the springs on the door have broken. These are what give the door the tension needed to open, but after so many uses they will break. 

We recommend contacting a professional for help with garage door spring replacement.

Garage Door is Making Squealing or Creaking Noises

When you use your garage door, are you noticing it making unusual noises such as squealing and creaking? That’s a sign that you need to lubricate the moving parts of the garage door. It’s important to do this regularly, as it helps the door work at full capacity for longer. 

It could also be a sign that the tracks are bent or dented, causing the noise. This needs to be dealt with as soon as possible, as it can actually damage the door and lead to you needing a replacement. If the dent isn’t too pronounced, you can use the same method described for removing dents to get it out. If you can’t though, you’ll need to look into having the tracks replaced. 

Garage Door Won’t Stay Open

You may find that when you open your garage door, it won’t stay open as it’s meant to. Instead, it’ll slide back down. This again will be due to springs being broken or worn out. As they’re worn out, they can’t provide the tension needed to keep the door open. Again, you’ll need to look into having them replaced in order to get the door working again. 

Garage Door Won’t Close Properly

When you close the garage door, does it hit the floor and then auto-reverse? This is going to be the fault of your limit switch. This is what tells your garage door opener that the door has reached the ground. If it’s not set properly, it will think that it’s hit something before the ground when in fact, it has just closed. This is why the door will auto-reverse when you try to shut it. 

This is something that usually happens when you have a new garage door, or a new garage door opener installed. The limits are probably wrong, and so the opener doesn’t know how far the door should go before it hits the ground. Check your manual to see how you can adjust the limits on your model. It may take some trial and error, but it won’t take long to get right.  

Garage Door is Sticking or is Totally Stuck

When you try to open your garage door, is it not opening all the way, or will it not move at all? This is a sign that there’s something wrong with the tracks. Again, a dent or bend in the track will be enough to cause problems, so you’ll want to repair them if you can.

If you can’t see a dent, it could be that something is stuck in the tracks, stopping the door from moving. Clean out the tracks and try the door again.

Request an Estimate

These are some of the most common garage door issues people experience with their garage door at some point or another. If you’re experiencing a garage door issue, contact Your Garage Door Guys and request an estimate.

We offer our service throughout the Ventura County and Los Angeles County areas.

Categories
Garage Door Maintenance

Garage Door Sensor Issues (And How To Fix Them)

Modern garage door openers include garage door sensors, which are designed to improve the safety of your garage and avoid personal injury. For this reason, it’s important to maintain the garage door sensors so they work properly.

In this article, we’re exploring several garage door sensor issues and how to fix them.

Garage Door Sensor Issues (And How To Fix Them)

Since 1993, it’s been required that all garage doors come with sensors. These are there for your safety, and 99% of the time they work perfectly. Sometimes they do malfunction though, and you’ll need to fix the problem as soon as possible. If you’re experiencing any issues with your sensor, here’s what you can do in order to fix them. 

Firstly, it’s important you realize how essential your safety sensors are. They sit at either side of your garage door and shoot an invisible beam of light between them. This is what detects if anything is sitting in the path of the garage door. If anything does break that beam, they send the signal to the garage door to open up again. This helps keep you safe, as it ensures that the door won’t be able to shut on you if you’re still in the way as it closes. It keeps your car safe too, as the door won’t close on it and damage it. 

A closing garage door can cause more injury than you’d think, so it’s vital that your sensors are working properly when you’re using the door. Sometimes you may find that the door isn’t closing all the way, but auto-reversing even when there’s nothing is there. If you notice this happening, it’s time to troubleshoot it.

Here are several common garage door sensor issues and how to fix them.

Dirty Sensor Photo Eyes

The simplest solution is often the one that works. Your photo eyes sit quite close to the ground, so they’re going to get dirty over time. This is especially true if the weather is wet and windy. Wind and spray from your tires are enough to cover them in the dirt. 

If this happens, the eyes are going to be blocked. As far as they’re concerned, the light beam is blocked and so something is in the way. That means the door won’t shut until you do something to fix it. Luckily for you, it’s very easy to fix. All you need is a soft cloth, and you can simply wipe the dirt off the eyes to get them clean again. Remember, you don’t need any cleaning fluid to do this. A dry cloth should be enough to get the dirt off.

Once you’ve done this, test the door again to see if it will close. If it will, you’re good to go. 

Clutter Blocking Sensors

Another very common issue is that your garage door sensors may be blocked by something in the garage itself. Many people use their garage to store things, whether it’s the lawnmower or boxes of items you’re keeping for sentimental reasons. Even if you keep the garage as tidy as possible, you’ll find that sometimes there’s too much in there, and a box is blocking the photo eyes.

Look for anything that’s sitting near the sensors, and move it away. Even the smallest items can cause disruption, and stop the door from closing. Now’s a good time to clean out your garage, and see if there’s anything you can throw away. If you do, there’s less chance of something making its way between the sensors. 

Once you have clean the garage out and moved as much as you can away from the door, you can then try the door again. You’ll see in most cases this is enough to get it working again. 

Sensor Mount Needs Reshaping

The mounts your sensors sit on are soft aluminum, and you’d be surprised how often they get bent out of shape as you use them. When you walk past them it’s very easy to kick them, knock them when carrying heavy objects, or even knock them in your car. When this happens, the sensor will not longer be in the right location, so you’ll see that the light beam can’t make it all the way to the other side. Again, the sensor will think something is in the way, so they won’t let the door close. 

If this happens, it’s very easy to fix it. The mounts are quite malleable, which is why they got knocked in the first place. You can try bending them back to see if you can get it back into the right position. This will, most of the time, get the sensors to work again. If the damage to the mount is quite severe, you may need to have it replaced. 

Sensors Need to be Realigned

If cleaning the sensors hasn’t worked, you may find that the sensors are slightly out of alignment with each other. If one sensor is off even a small amount, this is enough to break the beam between them. If you think this may be the case, you may need to realign the garage door sensors

Tie a length of string between the sensors, and use a spirit level to see if the string is level. If it isn’t, that’s a sign that the sensors are out of alignment. To fix it, you’ll need to loosen one sensor on it’s mount and move it up or down until you can get the string level. Once you’ve done that, try the door again. In the vast majority of cases, this will be enough to get the door closing again. 

Safety First

If you’re going to try to fix your sensors to get them working again, remember to keep yourself safe as you do so. Open up your garage door and secure it, and disconnect the garage door opener. This will stop it from closing on you as you work on the sensors. 

It’s also a very good idea to have someone with you, in order to keep you safe as you work. They can watch over you and catch any issues before they happen.

Now you know what to look for if you do experience any problems with your sensors. They’re easy to fix if you know what you’re looking for, so try getting them working again if you experience issues. If you’re ever unsure though, it’s always a good idea to call an expert for help.

Categories
Garage Door Maintenance

Garage Door Panel Repair Tips

Today, we’re sharing a few garage door panel repair tips you need to know if you have a garage door. A garage door involves several mechanical parts that may wear down over time and need maintenance and repair.

In this article, we’re taking a closer look at some of the most important garage door panel repair tips.

Garage Door Panel Repair Tips

Every homeowner has been there at some point. You’ve accidentally backed up too far in the car and backed into the garage door, denting it. Or your kids have been playing outside and kicked a ball into the door. Even the weather can damage the door, so at some point, you’ll need to look into garage door panel repair.

If the panel has become damaged, don’t worry. There are ways you can repair that panel and get it looking as good as new again. In many cases, the panel can be fixed, or replaced, without having to replace the whole garage door. Here are some good tips on how to repair your garage door panels. 

Repair Your Garage Door Panel Quickly

If there’s a dent or damage to a garage door panel, you’ve got to repair it quickly. Right now, the problem is only cosmetic. The trouble is, a dented or damaged panel will create more problems over time. The dent will put stress on the tracks as you open and close the door. Eventually, the door can jump the tracks, becoming dangerous. 

It’s not too difficult to repair the damage, especially in steel garage doors. Try one of these tips first before you try opening the door again, as they may be enough to reverse the damage. 

Consider the Age of The Door

As you’re thinking of repairing the garage door panel, consider the age of the door itself. Older doors may be trickier to repair, and so you may want to look into replacing them instead. The average lifespan of a garage door is around 20 – 25 years, so if your door is older it’s going to be harder to find a new panel, should you need it. 

If this is the case and you have a simple dent, you can try some of the tricks listed below first. If they work, then you’re good to go. If not, you may need to consider replacing the garage door panel

If you had the door installed fairly recently and you can’t get the damage out yourself, then you can talk to your installation engineer. They can help you get the right replacement panel, and even install it for you if needed. 

Garage Door Repair Safety

Before attempting any repairs on your garage door, you need to ensure you and your family are safe. If you have an automatic garage door opener, make sure you unplug it before you get started. This ensures that no one can accidentally open the garage door while you’re working on it.

Also, ensure that no children or pets are in the vicinity, to keep them safe. 

Try Hammering the Dent Out

Firstly, you can try hammering the dent out of your garage door. You’ll need a 2 x 4 of wood and a rubber mallet for this. Place the wood over the place where the garage door panel has dented. Use the rubber mallet to tap the wood, in order to pop the metal back into place. In many cases, this will be enough to push the metal back and make the door look as good as new again. 

The Aluminum Foil, Compressed Air, And Lighter Trick

Another way of repairing a dent is to use aluminum foil, compressed air, and a lighter. It sounds strange, but it’s a tip that works well for cars and garage doors too. If you dented your car as you dented the garage door, you could certainly try it on both.

To do this, first wash the damaged area down with water and dish soap. Allow it to totally dry, and then fetch your tools. Cut off enough foil to cover the dent, with some excess so you can hold the foil onto the door. Lay the foil flat against the dent, and then move the lighter back and forth against it for a minute. Once you’ve done that, remove the foil and then spray the area with compressed air. 

When you do this, you’ll see that the dent pops back into place. The temperature difference between the compressed air and the heated dent will make it pop back into shape. Once this happens, hose it down to finish. 

Replacing Your Garage Door Panel

If the above hasn’t worked, then you’ll need to replace the panel. With many garage doors, this isn’t actually that difficult. As you look at your garage door, you’ll see it’s made up of several panels that are screwed together in order to move smoothly when opened or closed. You can easily take the damaged panel out, replace it, and have a working garage door again. 

To remove the panel, unscrew it from the one next to it and slide it out. If it’s not on top, you’ll need to remove that panel too in order to get to it. Then, reverse the process by sliding in the new panel, screwing it in, and then testing the door to ensure it opens and closes properly. 

When to Call The Experts

Have you tried the above tips but can’t repair your panel? If it hasn’t worked, the damage may be more severe. In these cases, you’ll be ready to call the experts. They will help you get the panel out and replaced, so you can use your garage door again. They’re also the right people to call if you’re not too sure about going about the repair yourself. If you’re less than 100% certain, always call an expert to come and help you with it.  After all, it’s better to call them in than perhaps make an error in your repair. 

Repairing your garage door panel is a lot easier than you’d think in a lot of cases. A simple dent is easily popped back out with a hammer, or with foil and compressed air. Even if that doesn’t work, you can replace the panel itself and get your garage door working again. Remember, if you ever need help with the repair, you can call on the experts to help you get it done. 

Categories
Garage Door Maintenance

Popular Garage Door Service and Repairs

If you have a garage door, you might run into problems in the future. Garage doors require maintenance and involve several components that might need repair depending on the usage.

In this article, we’re taking a look at the most popular garage door service and repairs.

Popular Garage Door Service And Repairs

Your garage door is one of the most important parts of your home. It protects your car when you’re home, keeps the elements out, and is a vital part of home security. Like any other part of your home though, you need to do maintenance and repairs on it from time to time. Here are some of the most popular repairs that are searched for online, and how to do them. 

Door Opener Repair

Most garage doors now use automatic openers. These make life a lot easier for you, as you all you need to do is push a button on your remote, and you’ll be able to drive right into your garage. Sometimes the opener won’t work though, but it’s usually quite simple to repair it

Firstly, look to see if the batteries in the remote have died. This is the most common reason why the remote isn’t working. If that doesn’t work, look to see if the contacts in the remote have corroded. If the remote is older, this may have happened, and it’s very easy to polish them.

You may also need to look at the opener unit in your garage itself. Check to see the stop cord hasn’t been pulled. This removes the opener from the track for safety, and stops it from opening. Also, check that it hasn’t been unplugged, as this is a common issue and an easy fix.

Fixing Your Photo Eye

The photo eyes on your garage door sit either side at almost floor level, and fire a light beam between them. They’re a safety feature, as if the beam is broken it will not allow the door to close. If the door won’t close, there could be an issue with them.

Firstly, clean them off to see if this helps. As they’re so close to the ground, it’s easy for them to get dirty and therefore become blocked. If that doesn’t work, try realigning them. The eyes can be adjusted, and it’s very easy for one to get knocked and so be out of position. Tie a length of string between them, and adjust the eyes until the string is totally level. 

Replacing Or Repairing Panels

Accidents happen, and you’ve reversed your car into the garage door. Perhaps your kid kicked a football into it. Whatever happened, now you need to now repair the door panel thanks to the dent that’s been put into it. If you have a steel garage door, you may be able to ‘pop’ the dent back out. To do so, you can use a 2 by 4 of wood and a rubber mallet. Hold the wood against where the metal is dented out, and use the mallet to hit the wood. This should ‘pop’ the dent back into place.

If the damage is more severe you can replace the panel, too. To do this, order new panels from the supplier who originally fitted your garage door. Unplug the garage door opener, and unscrew the bolts holding the panels together. Now, remove the panels in your garage door until you can reach the one that needs to be replaced. They should slide off the track to allow you to do this. 

To attach the new panel, slide the rollers into the track and lower the garage door until the upper panel is touching the new panel, which should be sitting on the floor. Reattach it by reattaching the screws or bolts, and repeat this process for any panels you had to remove too. 

Mending Bent Garage Door Tracks

Your garage door tracks need to be totally straight, as they’re what your garage door travels on as it moves up and down. Again, it’s very easy for someone to bump into it and bend it slightly. This is enough to stop the garage door opening, and maybe even allow it to jump the tracks. It’s important to mend this as soon as you find it, to stop this from happening. 

This is a job you can do with a claw hammer, if the bend isn’t too bad. Firstly, open the garage door so it’s bottom is past the seam where the vertical track and the horizontal track meet. Secure it in place with clamps. Place the claw part of your hammer on the part of the track that’s bent, and straighten it as much as possible. 

You may then need to remove the bolts securing the track to the wall, in order to fully straighten out the track. Once you’ve done so, replace the bolts and test the door to see if it will open and close normally again.

If you’ve done this and the door still won’t work properly, or the bend is too severe for yo to fix, you’ll need a new track. In this case, you’ll need to call a garage door engineer to come and replace them for you. 

Replacing Broken Springs

If you’ve heard a loud band coming from your garage, then you may have had a spring break. These are what take the tension of the garage door when you open it. They wear out over time, and so they will break if overstressed. If this happens, you’ll need to replace the spring before you can use the door again.

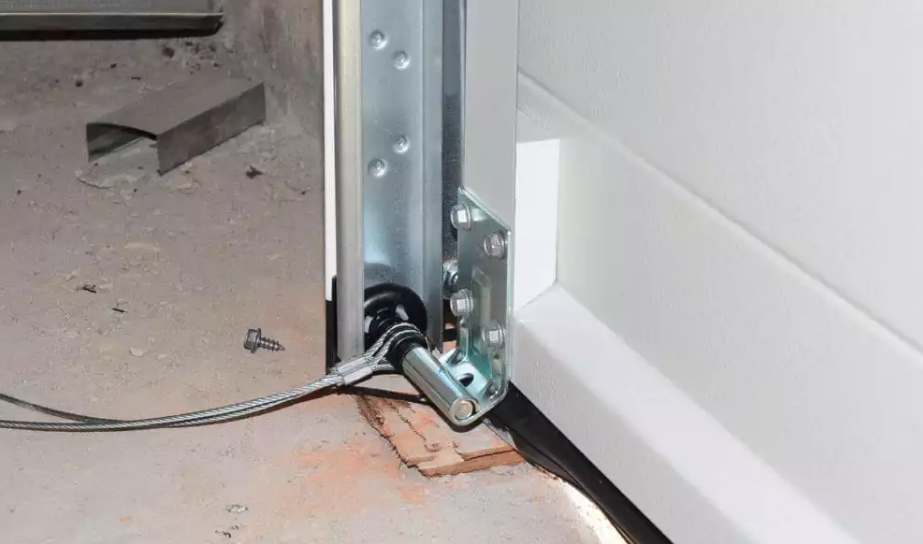
Remember that these springs hold a lot of tension, so be very careful when handling them. There should be a cable running through the broken spring, which stops it from pinging away from the door and causing damage when it breaks. This guide shows you how to remove that cable and the old spring and reattach the new one. 

If you’re not sure how to do this, it’s a very good idea to call the experts. Garage door springs are dangerous and you’re better to be safe than sorry. 

These are some of the most common problems that you’ll run into with your garage door. The great thing is that most of the time, you will be able to correct the problem yourself. 

Categories
Garage Door Maintenance

How To Repair Garage Door Sensors

If you find your garage door isn’t opening or closing, the first thing you want to check is the garage door sensors. These will be located at the foot of either side of your garage door and may fall out of alignment, collect dust, or break over time.

In this article, you’ll learn how to repair garage door sensors so you can get your garage door back up and running quickly.

How To Repair Garage Door Sensors

There are several steps involved in repairing garage door sensors.

The first couple of steps involve inspects, so we’ll start there in order to determine if there’s a problem in need of repair or if the sensors simple need cleaning or realignment. You should be able to work through these steps pretty quickly, so let’s get to it …

Here’s how to repair garage door sensors quickly.

1. Clean the Sensors

Your sensors are two photo-eye lenses, mounted at the bottom of the garage door on both sides. They help sense anything that’s in the way, but they’re also in the worst spot when it comes to dust and dirt. It can build up over time and block the lens entirely.

If you’re having problems with the sensors, the first thing you should do is clean them off. Take a soft cloth and wipe off any dirt you see on the lenses. In most cases, this will be enough to get it working again. 

2. Look for damage

Being located at the bottom of the door, your sensors are also vulnerable to damage. They can easily be hit by a car, or by someone simply walking by and accidentally kicking it. Take a look to see if there’s any damage. If so, they may need to be replaced.

3. Realign the sensors

If cleaning the sensors didn’t work, they may need to be realigned.

This is another simple job you can handle yourself, should you need to. On some models, you’ll see that there’s a light that blinks if it’s not in alignment. Keep a lookout for this, and you’ll be able to correct it.

Loosen the nut or screw that’s holding the sensor in place, and then tie a piece of string to both sensors. Lay a spirit level over this, and check if it’s level. If not, adjust the sensor until it is level with the other one, and then secure it back into position. Test the door again before finishing up.

Related: How to Align Garage Door Sensors

4. Check the power

This is a very obvious step, but it’s important to check that the sensors are getting power.

If they aren’t, they aren’t going to work. Take a look at your sensors and see if any lights are showing on them. If not, they may not be properly plugged in or drawing power.

5. Check the wires

If the sensors are properly plugged into power, it may be the wires that are at fault. It’s important that you check they aren’t frayed or damaged.

If they are, replace them as soon as possible. As well as stopping your door from working, they’re also a potential fire risk.

6. Replace the units

If nothing else works, then it’s time to replace the units themselves. Sometimes parts break down or become faulty, so they’ll need to be replaced.

If you’re confident at DIY, you can replace them yourself. You’ll need to take the old sensors off the door, clipping them away from the wiring connecting them to the power. Attach your new sensors into those spots, reattaching the wires as you do so. Before you tighten them fully, align them as described above.

Once you’re happy with the positioning, screw them into place and test the door.

The Importance of Garage Door Sensors

What is the purpose of your sensors?

Their primary use is for safety. With an automatic door, you’ll push a button to open it, drive your car through, and then the door will close behind you.

The sensor comes into play if anything remains under the door when it tries to close. If there is anything, the door will reverse and open again, until the obstruction is removed. It prevents damage to your car and keeps the whole family safe when using the garage.

In the past, these sensors were mechanical and would reverse the door when the door touched the sensor physically.

These days, you’re much more likely to use a photoelectric eye as your sensor. In fact, these were made a legal requirement in 1993. These sensors have a beam that’s fired across the bottom of your doorway.

If anything breaks that beam, the system will not allow your door to shut until it has been removed.

A Note On Safety

Even if you’re simply looking to learn how to repair garage door sensors, it’s should be noted that working on any part of a garage door can be dangerous. Garage doors involve many moving parts, heavy equipment, and electrical components, so always approach the garage door with caution.

Before you attempt any repair on your garage door, it’s vital that you turn off the power to the door while you work on it.

You can usually do that on the garage door opener itself, so you won’t have to worry about the door closing on you while you’re working on it. If you’re not sure how to do this, you could turn off power to the garage itself at your circuit breaker.

Maintaining Your Garage Door Sensors

Once you’ve got your garage door sensors working again, you’ll want to ensure that they’re in top working condition from now on.

It’s best to include them in a regular all over garage door check, to see how they’re doing. At this point, you can spot any damage, and clean the eyes off to keep them clear and unobstructed. Doing this will ensure that you have fewer breakdowns and issues with the sensors, saving you money in the long run. Get into the habit of doing this, and you’ll find everything runs a lot smoother.

Fixing your garage door sensors is much easier than it looks. Often, all you’ll need to do is clean off the lenses or realign the sensors when needed. Even if they need to be replaced, it’s not too difficult to do. If you need help, you can always call an engineer to take a look for you.

Conclusion

Now that you know how to repair garage door sensors, you can work through each step and check to see if the problem was related to your sensors.

If you find the problem isn’t related to your garage door sensors, you may need to call a local garage door repair company. A professional repair service will provide a garage door inspection and offer an estimate for the required parts and repairs.

In most cases, the garage door sensors simply need to be cleaned or aligned. However, this may not be the case if your sensors are on the older side, weren’t installed properly, or need to be replaced due to damaged equipment.

If you’re in our service area, please consider making us Your Garage Door Guys.

Categories
Garage Door Maintenance

How to Lubricate a Garage Door (8 Easy Steps)

If you want your garage door and garage door opener to last for years to come, it’s important to keep both maintained properly. Performing regular inspections and maintenance will ensure your garage door is operating smoothly.

Taking the time to do this will also reveal potential problems before they cause damage in need of a major garage door repair.

Here’s how to lubricate a garage door yourself in 8 easy steps.

How to Lubricate a Garage Door

Lubricating your garage door is a simple task and will make the world of difference to your garage door.

Here’s how to lubricate a garage door:

Step 1: Close your door and cut the power to it. You want the door shut so you can access all the moving parts. Cut the power to it to ensure that it won’t open up while you’re working on it, keeping you safe.

Step 2: Clean out the tracks. These are what your garage door travels on when you’re opening and closing it. They don’t need to be greased, but they do need to be clean and free of debris in order to work properly.

Step 3: Buy an appropriate lubricant for your garage door. The best kind is a spray variant that you can easily apply.

Step 4: First, start by lubricating your hinges. Open the door slowly, and spray in lubricant in the hinge where it meets the track. This ensures that every part of the hinge is lubricated properly.

Step 5: Next you need to lubricate the rollers. These contain ball bearings that help the door roll-up. Use the thin hose attachment that came with your lubricant, and spray inside the rollers so the ball bearings are coated. If there is any excess, wipe it away with a rag so the door doesn’t become unbalanced.

Step 6: Now you need to spray your bearing plates and springs. You’ll need a stepladder to ensure that you can reach these and fully coat them with lubricant. Once you’ve done this, open and close the garage door to spread the grease around.

Step 7: You need to next lubricate the lock on the garage door. This makes it easier to lock and unlock and will prevent rust in the long run. You’ll just need to spray the lubricant once into the lock to properly lubricate it.

Step 8: Finally, you need to lubricate the top of the rail. This is what the chain travels along in order to open the garage door. Be aware that lubricating the bottom of the rail won’t do anything, and the chain itself comes with a natural protective coating, so it shouldn’t need greasing. Spray down on the top of the rail, and use a rag to move that grease around.

Once you’ve done this, your garage door has been thoroughly lubricated. When you open and close the door, you’ll hear that it’ll barely make any noise at all. It’s amazing what a difference just one can of lubricant has.

Why Lubricate Your Garage Door?

Firstly, you need to know why you need to lubricate your garage door in the first place.

Does your garage door squeak and screech every time you use it?

Many homeowners assume this is just how they are, and put up with the noise. In fact, that noise is a warning that the door needs lubrication and will become damaged if you don’t handle it. If your door is starting to make a lot of noise when you open and close it, you need to lubricate it. However, this is an easy job that you can handle yourself.

What Lubrication To Use

To get the best results when lubricating your garage door, you need to pick the right lubrication.

A popular choice is WD-40, but whatever you do, don’t use it on your garage door. People often think it’s a lubricating solution, when in fact it is for degreasing and rust removal. It will offer some benefits of lubrication for a short while, but in fact, it will make things worse in the long run.

What should you use instead? The best options are a silicone spray or white lithium grease. These are designed to lubricate moving parts and help them move with ease. They’ll often come in spray forms, which make them even easier to get into the moving parts.

Take a look at this good comparison of garage door lubrication products to get started.

Other Ways To Maintain Your Garage Door

Lubricating your garage door is one way you can keep your garage door in good condition. Here are several other ways you can keep the door in good condition for years to come.

Test the garage door balance: If your door is unbalanced, then it will put more strain on the door. Open the door up to halfway and leave it there. If the door can’t stay open, you’ll need to call an engineer to remedy the problem.

Test the auto-reverse feature: The auto-reverse is there to keep you safe, so you need to ensure it’s working as intended. Place a block of wood in the path of the door, and try shutting it. If the door doesn’t stop or stops too late, then you’ll need to change the settings on the door to make it more sensitive.

Clear out the tracks: Clearing out the tracks is mentioned earlier in this guide, but it’s hard to overstate how important it is. If there’s a blockage in the track, it’ll stop the door opening and maybe even damage it. Clean it out with a rag, and use a vacuum clear to handle any hard to reach debris.

Groom the door: Finally, you need to keep up with the exterior of your door. If it’s a wood door, check or warping or wood rot. If it’s steel, look for rust or dents that need to be addressed. Doing this will hugely help the appearance of your home.

Conclusion

Now that you know how to lubricate a garage door on your own, you can keep your door maintained and ensure it runs smoothly for years to come.

Categories
Garage Door Maintenance

How to Change Battery in LiftMaster Garage Door Opener Keypad

It can be frustrating to discover your garage door isn’t working properly. In some cases, however, the solution may be as simple as changing the battery of your garage door opener keypad.

If your garage door fails to function properly, try following the steps below before calling a professional garage door service provider.

Here’s how to change battery in LiftMaster garage door opener keypad.

How to Change Battery in LiftMaster Garage Door Opener Keypad

Keyless entry methods for your garage door, such as keypads, are a game changer when it comes to home security.

There are no more worries about losing or forgetting your keys, as all you need is the code to get into your garage. These keypads run off a battery, so eventually, you’re going to need to change it out.

If the battery in your keypad has died, here’s how to replace it.

How Long Does A Battery Last?

As with most things, the battery in your garage door keypad will last depending on how often it’s used.

The more you use it, the more power it’ll use and the quicker it’ll run out of juice. On average though, you’ll find that they last around a year before they need to be replaced. When you have your keypad installed the manufacturers will provide a battery for you.

After that, you’ll need to change it out yourself.

Troubleshooting Your Keypad

If you’re finding that your garage door keypad, it could well be that the batteries have died and need to be replaced. In some cases though, there could be something else interfering with it. Here are some reasons why your keypad isn’t working, and what to do about it:

  • Your batteries have died: The simplest and most obvious issue. The first thing to do is try replacing the batteries, as described below. If your keypad works after this, you don’t need to do any more troubleshooting.
  • The keys are sticking: Your keypad sits outdoors every day, and it will accumulate dirt and grime over time. When this happens, sometimes the keys start to stick and cause problems. If this is happening, all you need to do is clean off the keypad. Use a few drops of appliance cleaner on a soft cloth and clean off the keypad, making sure to get into the spaces between the keys. If you can remove the front of the box, remove it and remove any dust with a clean dry cloth.
  • The PIN has been reset: Are you putting in what you think is your pin several times, but the garage door won’t open? It could be that you’ve triggered a security measure in the keypad. In some models, once the wrong code has been put in several times, the system will ‘lock up’ and won’t work again until you set a new PIN. Press the ‘learn’ button on your motor, and put in a new PIN to use.
  • Loose or frayed wires: Over time, the wires in your keypad may have come loose. This means it can’t register when you press certain buttons, so it won’t work. If this is happening, you can remove the front of the keypad and inspect it for loose wires. Reconnect any that have come loose, and try the keypad again.
  • Reboot the system: If you’re not getting anywhere with the keypad, it’s best to reboot it. Like anything else computerized, it’ll clear the memory and help deal with a lot of stubborn issues. All you have to do is unplug the system for around five minutes, and then plug it back in. Try it again and it will likely work again.
  • Call a professional: Still not working? If the garage door still won’t open, it’s time to call in a professional to take a look at the keypad for you.

How To Change The Batteries In Your Keypad

So you’ve realized that it’s been about a year since the keypad was installed, and it probably needs new batteries. Luckily, it’s very easy to replace the batteries and get it working again.

Firstly, you’ll need to lift the cover of your keypad and take a look under the number pad. There should be a compartment for the batteries to be slotted in. If you’re not sure where this is, take a look at your manual as this will have the information you need.

Slide the cover of the battery compartment in order to access the batteries. Remove the old batteries, and dispose of them in a safe manner. If you’re not sure how to, there are recycling centers across the country that will take your batteries for you. Check online to see if there’s one near you.

Once that’s done, all you’ll need to do is insert a 9-volt alkaline battery into the slot, making sure you line up the polarities correctly. This should be indicated in the space the battery sits in. Once this is done, replace the cover, and then test the keypad to see if it works. This is enough in the majority of cases to get the keypad up and running again.

Other Reasons Your Garage Door Isn’t Opening

If the garage door won’t open even when you’ve gone through the whole keypad checklist, it’s a good idea to look at the rest of your garage door. There could be a few reasons why the door won’t open.

  • Broken springs: The springs on your garage door are what gives it enough tension to open and close. If the door won’t open, check your springs. Are they broken or worn out? Then this is your reason. A word of warning, you can replace your own springs, but its highly recommended you have a professional do it, as they’re highly dangerous.
  • Blocked sensor: Does the door fail to open all the way? The sensor could be blocked, sending the signal that something’s blocking the door. Try cleaning the photo-eye of the garage door sensor and opening the door. If it still fails to open, you may need to replace the sensor. Here’s how to tell if a garage door sensor is bad.
  • Unplugged garage door opener: Sounds simple, but it could be that the door was unplugged, stopping the opener from working. Give it a quick check to see if this is what’s happened.

It’s much easier than you’d think to solve issues with your garage door keypad when it’s not working. Follow the tips in this article, and you’ll have the door opening again in no time at all.

Categories
Garage Door Maintenance

How To Align Garage Door Sensors

Garage door sensors must be aligned to ensure your garage door opens and closes properly. Sensors may fall out of alignment over time, so it’s important to understand how to align garage door sensors. Garage door sensors are designed to prevent the door from closing if something obscures the sensor. This safety feature prevents the door from closing when something is in the way and at risk of becoming damaged or injured.

In this article, you will learn how to align garage door sensors so they close properly.

Why Align Your Garage Door Sensors?

The sensors are vital to your garage door opener. If it gets the signal to open or close, it’s going to do so no matter what. If there’s something or someone in the way, you want them to avoid getting hit with the door. You don’t want to dent your car or worse, hit someone with the door. When the sensors are working correctly, you won’t need to worry about this.

How To Align Your Garage Door Sensors

Here’s a step by step guide to aligning your garage door sensors properly. Follow them carefully, and the job will be done in no time at all.

Step one: Firstly, you’ll need to cut off the power to your garage door properly. The best way to do this is to trip the fuse to your garage in the breaker box. You won’t be working directly with any wiring, but when it comes to electricity, it’s always better to be safe than sorry.

Step two: Locate your garage door sensors. They should be at each side of the garage door, near the ground. You’ll want to unscrew them enough that they come loose, but they don’t come all the way out. You want to be able to slide them up and down without them coming out when you do so. They also need to stay put when you reposition them.

Step three: Now, slide those mounting brackets down low as you can, without them coming out of their position.

Step four: Locate some string, and tie it to one of the mounting brackets. It needs to be long enough that you’ll be able to pull it across to the other mounting bracket.

Step five: Pull that string across to the other mounting bracket, and tie it to it. The string should now be taut between the two brackets.

Step six: You now need to check that the string is level between the two brackets. Get a spirit level and hold it under the string. If the level shows the string isn’t even, adjust the mounting brackets until the string sits level.

Step seven: Now that the mounting brackets are in position, screw them back in tightly to hold them in this position. Once you’ve done that, ensure that you check the level of the string again. Screwing the brackets in can affect the alignment, so ensure you don’t skip this step.

Step eight: You’re now nearly done. Take the string off the mounting brackets, and turn the power back on to your garage door. The sensors are now aligned properly.

As you can see, adjusting the alignment is actually a lot simpler than you’d think. Follow these steps carefully and you shouldn’t have a problem.

Testing Your Garage Door Sensors

Now that you’ve got the sensors aligned, you’ll want to test them to ensure they’re working as they should. Again, this is quite simple to do so it’s worth taking the time to do it.

All you need to do is get a block of wood and place it in the path of the garage door. Use your remote to get the garage door to shut, and then see if it recognizes that something is in the way. If it’s working as it should, then the door should auto reverse before it comes near the wood. If it hits the wood, or it auto reverses too quickly, then you’ll want to adjust the sensitivity. This is usually done on the control system for the garage door opener. Check your instructions to find out exactly how to do this.

Safety Measures

Now, the sensors on your garage door aren’t the only things that are making your garage door safe. Here are some other maintenance tips that will help you keep it safe for you and your family to use.

Security

It’s hard to stress just how important security is to your garage door. It’s a major path into your home, so you want to ensure that no one can use it if you don’t want them to. For example, if you have an older garage door opener, you’ll want to update it. Older models don’t use rolling codes, which renders them more susceptible to burglars. You’ll also want to cover up windows in your garage door to deter would-be thieves and invest in good lighting to keep your garage lit up at night.

Pest Control

Did you know that your garage door is a target for pests, too? It offers a great entrance to a place where they can shelter and breed without being noticed. You’ve got to keep on top of that to ensure they don’t get into your garage. Keep the door shut when not in use, and take a look at your garage door seal every now and again. If there are signs of something chewing on it, you’ll need to get your garage inspected for pests, the sooner, the better.

Clean Out Your Garage

Yes, it’s a large undertaking, but it’s vital to your safety that you do so. The garage is a common dumping ground for all kinds of things that need to be cleared up. Sharp garden tools, flammable items and more all pose a risk. Take a day to clear out your garage, and remove anything that you don’t need. If you need to store flammable items in there, ensure that you’re only doing so in small quantities. Put anything sharp or dangerous on high shelves, where children can’t reach them.

With this guide you’ll be able to align your garage door sensors correctly, making your garage door safe for everyone to use.

Exit mobile version