Categories
Garage Door Maintenance

A Simple Garage Door Opener Maintenance Checklist

If you want your garage door to function properly for the entirety of its lifetime, you have to take care of it. If you fail to do so, your opener will almost certainly fail, fall into disrepair, and otherwise fall short of its full lifespan and require a replacement.

We know a thing or two about the topic, so we thought you might find it helpful to have a simple garage door opener maintenance checklist handy.

In this article, you will discover a few things you can to maintain the door opener so it functions properly over the years.

How Often Should You Maintain Your Garage Door?

You’ll need to know how often you need to be looking over your garage door for any issues to fix. According to most experts, you should be servicing that garage door annually. This is recommended for multi-car homes that are regularly opening and closing their garage doors. If you don’t use yours that often, you may be able to leave it a little longer between services, but you will still need to ensure it gets done.

Now, you’ve got to start checking your garage door. What do you do to ensure that it’s in good working condition? Work your way down this checklist and look for any problems. In most cases, your door should be fine. If you come across anything that’s not quite right, it’ll be time to call on a professional to come and take a look at it for you.

1. Watch Your Door

You can keep an eye on your garage door all year round, by watching it when you open and close it. You’re looking for it to open and close smoothly, with minimal noise. Is the door jerking or opening erratically? Is it making a lot of undue noise? Is it pulling up unevenly? Then it’s time for you to investigate to see what can be done to fix it.

2. Test The Garage Door Balance

If your garage door isn’t properly balanced, then it will have to work harder in order to open. This shortens the lifespan of your garage door opener. To test the balance of your door, disconnect the opener and manually open the door about halfway. It should stay in place once you let go of it. If it starts to close once you let go, the door will need some work to restore the balance. Usually, the springs will have worn out and will need replacing. In this instance, it’s better to let an expert handle it for you, as springs can be dangerous when handled improperly.

3. Inspect And Replace The Rollers

The rollers on your garage door opener will be either steel or nylon, and either way will need to be checked out to see if they need replacing. They will be wearing out if you notice cracks or chips in them. These are fairly simple to change out yourself if you follow the instructions in the manual you should have got with your garage door when it was installed.

4. Lubricate The Moving Parts

It’s amazing how many homeowners never think to lubricate the moving parts of your garage door, even though they’re moving multiple times every day. This part of the maintenance job will only take 10 minutes, and it’s essential to keep it working properly. Use spray lubricant on the overhead springs, and white lithium grease on the opener’s chain or screw.

5. Test The Auto Reverse Feature Of Your Door

The auto-reverse feature is essential on your garage door, as it keeps you safe when using your garage. Ensure it’s working properly by testing it. You’ll want to place a brick or piece of wood on the floor, then let the door start to shut on it. If the feature is working properly, then it should start to open again once it comes near to the door. If it doesn’t then the system will need adjustment. Again, this is something that you will need to get a professional to come and adjust for you.

6. Clear The Tracks

The tracks of your garage door need to be maintained to ensure the door functions properly. Dirt and dust will accumulate in those tracks and will affect the way it opens. You can get in there and clean them out, helping the door run smoother. If you want, you can use a level to check the plumb. If it’s significantly out of balance though, you’ll want to call in an expert to fix it for you.

7. Check The Door Itself For Cosmetic Damage

It’s a good idea to check the door for any exterior damage, as the weather can do a number on it over the year too. Look for any signs of rot or water damage in wooden doors, and check for dents in steel doors. These can be hammered out if they’re small enough. If there are any rust spots, you can sand them down and prime and paint them. If you wash your door with water and a mild detergent, at the same time as you wash your car, it’ll keep it clean.

Troubleshooting

If anything isn’t working, it’s a good idea to troubleshoot it before looking for help. Your manual should have some troubleshooting tips for any common problems that may crop up when you’re working on your door. Check them first, as you’ll often find a solution there.

Call In A Professional If Needed

If you’ve done all these checks and there are some things you’re not sure of, then the best thing to do is call your local garage door repair company. They will help you diagnose any issues with the door, and get it fixed for you quickly and safely. Remember, garage doors can be dangerous when they’re being repaired, so don’t take any chances with yours.

With this checklist, you’ll be able to keep your garage door in top condition every year. Stick to the list and you’ll catch any problems before they become bigger issues later down the line. If you’re ever unsure, it’s a good idea to call a professional service.

Categories
Garage Door Maintenance

How to Adjust A Garage Door

Over the years, your garage door may fall into disrepair if you don’t maintain the various components that allow it to function. If this occurs, you may need to adjust your garage door so it functions properly.

In this article, we will explore how to adjust a garage door so you know what to do should your door stop working.

How to Adjust A Garage Door

Your garage door has been designed to work perfectly every time you use it. Over time though, components can wear out and the door may not work the way it used to. When this happens, you’ll need to adjust the door in order to get the best use out of it. Here’s what to look for, and how to fix any problems that arise.

Here’s how to adjust a garage door so it works properly.

How to Check the Balance of Your Garage Door

The first thing to do is to check the balance of your door. You will need to see if all the components are working correctly and whether anything needs to be changed.

Turn off all power to your door (if any), and then manually lift it up and down a couple of times to ensure that it’s moving correctly in its tracks. Then, you’ll want to leave it halfway open, to see what happens. The ideal result here is that it stays in place where you left it. If it rolls down or slides up, you’re going to need to do some adjusting.

The most common scenario is that the door rolls down because there is less tension in the garage door springs. This can be a regular occurrence as the door springs get a lot of use, and so can wear out over time. You can fix this yourself (see below), but if you’re at all worried about doing it, it’s best to call in the experts to handle it for you.

Adjusting the Springs

To adjust or replace your springs, you’ll need to take all tension off the garage door. The best way to do this will be to rest the open garage door on a ladder, to hold it open. Now that it’s ready, you can take a look at the springs. If they’re quite loose, then you can remove them and replace them with new ones. If they just need a bit of adjustment, you can move them to the next hole away from the hanger.

Once you’ve done this, try testing the door again to see if it now hovers. If it does, you’ve been successful. If not, you may need to do more adjustment.

Test Your Garage Door Opening Equipment

If you have an automatic garage door opener, you should test your door regularly to ensure that it’s working correctly. This is fairly simple to do. You’ll need to do the following:

  • Testing the up/down limits: Close the door and then hold the button to open it. If it opens more than five feet but does not open all the way, then it will need some adjustment. The limit adjustment screw will need to be turned clockwise, in order to get it open properly.
  • Garage door force: If your door is reversing when you go to close it, it could be that the sensors are being blocked. Remove anything blocking the sensors, and try again. If this isn’t the problem, then you’ll need to increase the force of the door. If the door isn’t opening all the way, you’ll need to increase the up force.
  • Check the safety reverse: All modern garage doors will have this feature to ensure that the door won’t accidentally close on anyone in the way of it as it closes. You should test this feature to confirm that it’s still working effectively. Place a 2 by 4 in the threshold of the door and close it. If it stops but doesn’t open again right away, then you’ll need to adjust the system and retest it, to guarantee it works properly.

Maintaining Your Garage Door

If you’re finding problems with your garage door, this may mean that it needs to be maintained more regularly. Here are some maintenance tips you can follow to ensure that the door is still in good working order:

Firstly, check for any major wear-and-tear that you can see. If you’re handy, you might be able to do the repairs yourself. Make sure that these repairs are done before you use the garage door again.

Next, you’ll need to lubricate all the major moving parts so that the garage door will be moving well every time you open and close it. You’ll need to lubricate the combination hinge and rollers, the rest of the hinges, and the lock mechanism on the door itself.

Now, you’ll want to do all the tests that are detailed above. Double-check the opening mechanism and verify that it is working correctly and that it’s safe to be around. Then, you’ll want to check that the door is properly balanced – if you haven’t already done so.

Bu doing all of this, you’ll be ensuring that your garage door will be in good working condition for a long time to come. By keeping it in good shape, you’ll be minimizing any repairs that need to be made, and saving money on maintaining it.

Calling in The Experts

If you’re not too sure about a repair that your garage door needs or you think it would be safer to call in an expert, then you can call a company experienced in repairing garage doors. There’s a lot of good reasons why you would want to take care of your door by calling in a professional garage door repair service.

Firstly, they have the experience needed to help you get the most from your door. They may be able to see issues that you didn’t even spot when you examined your garage door. This ensures that everything is mended when it needs to be, and you won’t come across more problems later down the line.

Additionally, you’ll need to stay safe when you’re conducting repairs on your garage door. This is especially true when it comes to your springs, as they can cause serious injury when improperly handled. Having an expert handle it for you means that you’ll be safe, and you won’t have to worry when working on it.

These tips will help you properly adjust, balance and maintain your garage door. Use them when you’re checking your door for wear-and-tear, and know when to call in the experts when you need some help.

Categories
Garage Door Maintenance

Top 10 Garage Door Maintenance Tips

The garage door is the home’s largest feature, and one of its most frequently used. They provide security and style for years to come.

Below are ten maintenance tips that all homeowners should do to keep their door in its best condition. For best results perform routine maintenance at least once a month and consult your owners manual for other recommended services.

1. Perform visual inspection of hardware

Thoroughly inspect hardware including moving and non-moving parts like brackets, cables, framing, pulleys, rollers, and springs. You’re looking and listening for signs of wear, anything that doesn’t look or sound right.

Listen for squeaking, clicking, or knocking sounds as the door raises and lowers. It should operate smoothly and nearly silently.

Make sure hardware is free of dust and debris or spider webs that can obstruct operation. Also check for knicks in any materials, and frays in the cabling that are signs of impending failure.

2. Check lubrication of moving part

All moving parts should be lubricated unless they’re constructed from plastic. Items such as plastic rollers or idler bearings don’t need to be lubricated, but metal parts do.

White lithium grease is the best lubricant because it doesn’t contain additives that leave a residue or inadvertently degrade the metal. It’s easily and conveniently available from big box home improvement stores and comes in easy-to-use spray bottles.

For best results make sure the areas are clean before applying lubricants. It’s not necessary to use detergent to clean the surfaces, and detergents can actually cause damage to the structures. Simply wipe down the surfaces, vacuum the areas, or use a blower to remove dust and debris.

3. Complete reversal test

If your garage door opener was manufactured after January 1, 1993, then it complies with the most current federal safety standards which require the unit to be equipped with a reversing feature. If your opener is older than that and doesn’t have one, then it needs to be replaced with one that does have this safety feature.

Testing the reversal function involves placing a piece of wood or other similar items on the floor in the center of the open doorway. Push the wall button or use the transmitter to close the door. It should automatically reverse direction when it contacts the item. If it doesn’t then you need to consult a professional garage door repair company.

4. Complete force setting test

Doing a force test is another safety measure because proper force keeps the door from accidentally closing on a person, pet, or vehicle.

Test the force by holding the bottom of the door while it is closing. When properly adjusted the door will quickly reverse. If it doesn’t then there is too much force and the door needs to be adjusted to a lighter number.

Make sure to check the system again after making the adjustments.

5. Check the door’s balance

Your garage door should open smoothly and evenly whether you use an automatic opener or operate it manually. Unbalanced doors cause premature damage to the door’s components, and leaves gaps in coverage.

Adjusting the door’s balance involves changing the tension of the springs. Doing so can be dangerous because the springs are under a lot of pressure; if they come undone or break they cause serious bodily harm.

6. Replace the weatherstripping

Supple weatherstripping located at the bottom of the garage door is instrumental in preserving the items stored in your garage. It acts as a barrier against the elements so that things like snow, rain, and small animals can’t get inside.

Make sure it’s not cracked or brittle, or that any sections are missing. Replacing it should be fairly easy; weatherstripping is sold at major home improvement retailers.

7. Check other safety features

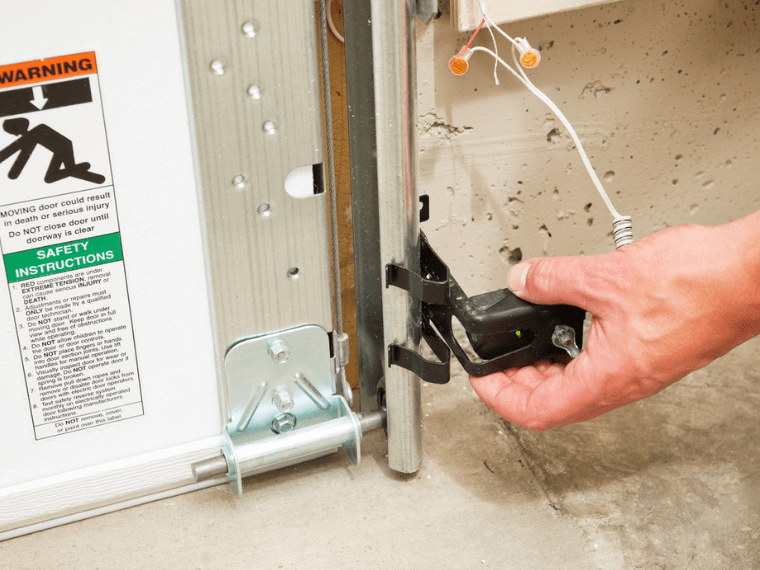
Many new garage door systems are equipped with additional safety features such as infrared photo eyes, and edge sensors that ensure the doorway is clear before it fully closes. These sensors should be installed no more than six inches from the floor.

The infrared sensors should be able to detect when an object moves into the doorway during operation. To test this function you’ll need a large item such as a bucket or piece of wood.

Stand near the edge of the open door then use your remote to close the door. Move the bucket or piece of wood into the doorway so that it interrupts the infrared beam. The door should automatically stop, or begin opening.

8. Install a containment cable

Spring doors are under a lot of pressure, and breaking can cause serious damage to nearby people and objects. Containment cables are a safety feature that keeps the garage door spring from dangerously flying out.

Containment cables are fed through the extension spring then bolted to the bracket on the upper front rail; on the other end of the spring, the cable is secured with a washer and nut.

Once installed you should periodically inspect the cable itself, the bracket, and the hardware. The cable shouldn’t be bent or frayed. The bracket should be secured to the rail. Consult a professional if anything looks worn or feels loose.

9. Check the tracks

Damage to your door’s tracks causes it to become unbalanced and prematurely wear your equipment. Tracks don’t ordinarily move but can get bent or broken if hit by a vehicle or other equipment. The screws used to attach the tracks may also become rusted or loose.

10. Inspect and repair the surface of the door

Modern garage door materials are durable and intended to last many years with very few problems, but that doesn’t mean they can be ignored, especially if you’re in an area prone to inclement weather such as hail or hurricanes.

Small dents aren’t usually cause for concern. But large cracks and damage should be repaired as soon as possible.

Final Thoughts

Your home’s garage door is a high-traffic item intended to last several years. Keeping it safe and functional requires regular maintenance throughout the lifetime of the door. These guidelines are things all homeowners should keep on their “to do” list.

Exit mobile version